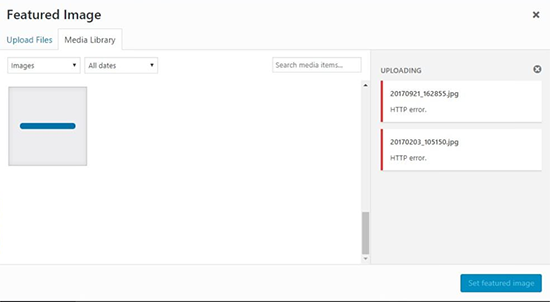
When uploading an image or other media files into WordPress using the built-in media uploader, sometimes you will see the HTTP error. Let's see how to fix it.
What Causes HTTP Error During Media Upload in WordPress? It's because WordPress is unable to figure out the cause and that’s why it displays the generic ‘HTTP error’ message.

1. Make Sure The HTTP Error is Not Temporary
Wait a few minutes and then try uploading your image file again. Sometimes it's due to the unusual traffic and low server resources.
If that doesn’t work, try uploading a different image file. => If successfully, then try saving your original image file to a smaller size and retry uploading.
Lastly, you may want to try saving the file to a different format. For example, change jpeg to png using an image editing software. After that, retry uploading the file.
=> If all these steps result in the HTTP error, then the error is not caused by a temporary glitch
2. Increase WordPress Memory Limit
Lack of memory is the most common cause. To fix this, you need to increase the amount of memory PHP can use on your server.
You can do this by adding the following code to your wp-config.php file.
define( 'WP_MEMORY_LIMIT', '256M' );
This code increases the WordPress memory limit to 256MB, which would be enough to fix any memory limit issues.
3. Change Image Editor Library Used by WordPress
WordPress runs on PHP which uses two modules to handle images. These modules are called GD Library and Imagick. WordPress may use either one of them depending on which one is available.
However, Imagick is known to often run into memory issues causing the http error during image uploads. To fix this, you can make the GD Library your default image editor.
You can do this by simply adding this code to your theme’s functions.php file or a site-specific plugin.
function wpb_image_editor_default_to_gd( $editors ) {
 $gd_editor = 'WP_Image_Editor_GD';
 $editors = array_diff( $editors, array( $gd_editor ) );
 array_unshift( $editors, $gd_editor );
 return $editors;
}
add_filter( 'wp_image_editors', 'wpb_image_editor_default_to_gd' );
Now, retry uploading files using the media uploader. If this doesn’t solve the issue, remove this code and try other methods described in this article.
4. Using The .htaccess Method
This method allows you to control how Imagick uses server resources. Many shared hosting providers limit Imagick’s ability to use multiple threads for faster image processing. However, this would result in you seeing the http error when uploading images.
An easy fix is to add the following code in your .htaccess file:
SetEnv MAGICK_THREAD_LIMIT 1
This code simply limits Imagick to use a single thread to process images.
After all, please check your site again.
Source: WPBeginner


